
What Cables Do I Need For SSD? Simplified Guide

When you purchase an SSD, you may wonder what cables you need to plug it in. In this article, I will discuss the cables and connectors you may need to get your SSD up and to run. Be cool. It’s not rocket science. Do it yourself. 🙂
In summary, There are two main types of SSDs: SATA and NVME. NVME SSDs do not need a cable and plug into your m.2 port directly, while SATA SSDs need a SATA cable for data transfer and a power cable to give power. So if you have SATA SSD, the below cables need. Links will take you to Amazon.
- A power cable to provide electricity to the SSD – StartLink Power cable
- A data cable to connect the SSD to your motherboard or laptop – SATA Cable
SSD Power Cable ( Requirement No 1 )
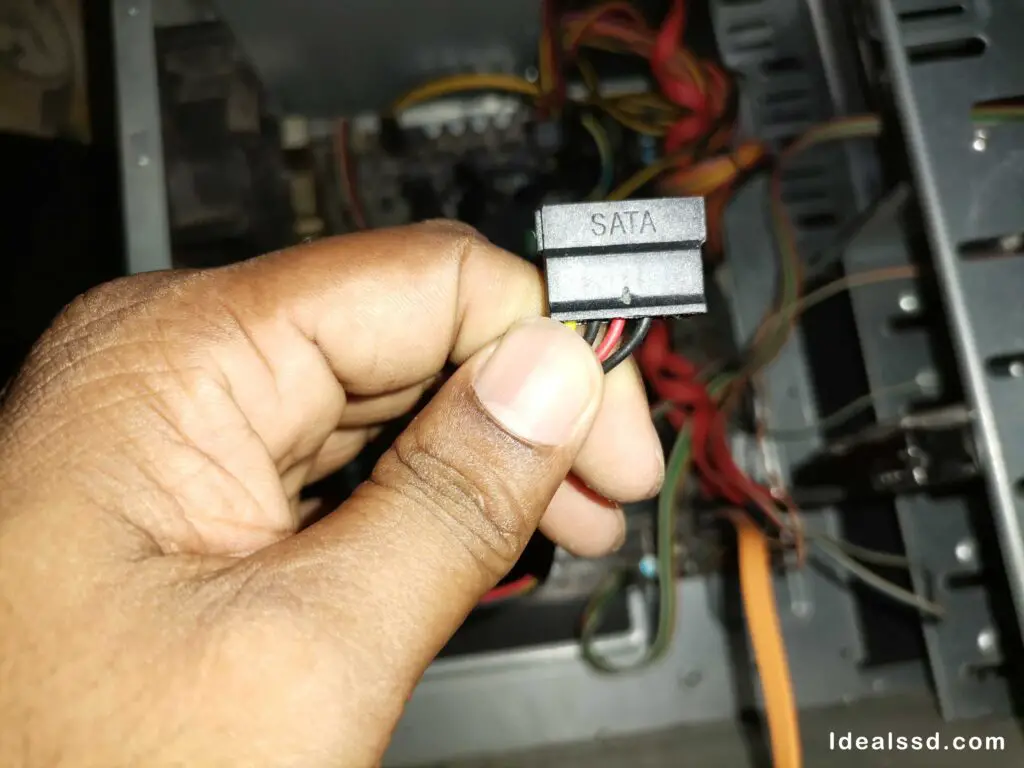
The power cable is a necessary component of your SSD. This cable provides power to the SATA SSD, and it must be connected to use your SSD. The power cable is usually a thin, black cable with a connector that looks like this:
When connecting the power cable to your SSD, align the connector properly before inserting it. If the connector is not properly aligned, it could damage the port on your SSD. Once the connector is firmly inserted, you should hear a click that indicates the connection is secure.
If you do not hear this click, or if the connection feels loose, remove the connector and try again. With the power cable properly connected, your SSD will now be able to receive power and operate correctly.
These power cables plug into the back of your computer’s power supply. Some power supplies have two connectors, so check before buying a power cable. If you don’t have a spare connector, you may need to purchase a new power supply for your computer.
Why It’s Crucial To Get A Quality Power Cable For Your SATA SSD?
- Provides stable power supply: A quality power cable ensures a consistent and stable power supply to the SSD, preventing any voltage fluctuations that can cause the drive to malfunction or fail.
- Reduces electromagnetic and radio frequency interference: A quality power cable can help reduce the amount of electromagnetic and radio frequency interference, which can affect the performance of your SSD (This is minimal, but keep in mind) and cause data corruption or errors.
- Proper grounding: A quality power cable will have a proper grounding, which helps prevent electrostatic discharge that can damage the components inside the drive.
- Ensures reliable and efficient operation: By providing a stable power supply and reducing interference, a quality power cable can help your SSD operate reliably and efficiently without the risk of data loss or hardware failure.
- Saves money in the long run: Investing in a quality power cable may cost more initially, but it can save you money in the long run by preventing hardware failures and data loss resulting from using a poor-quality or damaged power cable.
I purchased the below power cable from amazon, which supports 4 receptions. It really cool.
SATA Power Splitter Adapter Cable (4x Receptions)

Looking for an easy way to power multiple SATA drives? This nifty SATA Power Splitter Adapter Cable provides a single SATA power plug to four SATA power receptacles, making it simple and easy to add more storage to your system.
The durable construction ensures that the cables will last through repeated use, while the flexible design makes installation a breeze. Add this must-have accessory to your toolkit today!
15 Pin SATA Power Y-Splitter Cable

If you’re looking for an easy and affordable way to add a second SATA hard drive to your computer, look no further than this 15 Pin SATA Power Y-Splitter Cable.
This handy cable lets you share a single power connection from your computer’s power supply with two SATA devices, like HDD, SSDs, optical drives, DVD burners – anything that uses a SATA power connection. It’s a great way to add extra storage to your computer or to make upgrading or repairing your system easier.
SATA Data Cable ( Requirement No 2 )
An SSD data cable is a cable used to connect an SSD to a computer. This type of cable is also known as a SATA cable. The SATA cable helps to transfer data between the SSD and the computer. It doesn’t matter if you purchased a 120GB SSD or a higher capacity SSD like 1TB, 2TB or more. You will still need to use the SATA III cable.

Why It’s Crucial To Get A Quality SATA Data Cable For Your SATA SSD?
- Prevents data loss: A quality SATA data cable can help prevent data loss by providing a stable and consistent data transfer between the SSD and the computer.
- Ensures high-speed data transfer: A quality SATA data cable will support high-speed data transfer rates, allowing your SSD to perform at its maximum potential.
- Increases system stability: A quality SATA data cable can help increase the stability of your system by ensuring a reliable connection between the SSD and the motherboard.
- Supports future upgrades: A high-quality SATA data cable will support the latest SATA standards, allowing you to upgrade your SSD or motherboard without needing to replace the cable.
If you have an older motherboard or laptop, don’t worry – most modern SSDs are backward compatible with SATA II and even SATA I. However, you cannot take advantage of the SSD’s full performance if you use a slower port.
| SATA Interface | Interface Gb/s | Bandwidth Throughput |
| SATA I | 1.5Gb/s | 150MB/s |
| SATA II | 3Gb/s | 300MB/s |
| SATA III | 6Gb/s | 600MB/s |
When choosing an SSD data cable, ensuring you get a quality product is important. Many low-quality cables are available on the market, so it is important to research and find a reputable company. Here’s a link to what I bought.
SATA Cable III (6Gbps) – Cost-effective 3 Pack Combo

With data transfer speeds of up to 6 Gbps, the SATA Cable III is perfect for fast file transfers between your system and HDD or SSD.
The locking latch on each end of the cable ensures a secure connection, while the 3-pack combo offers an economical way to provide replacement or spare cables for different SATA systems or RAID configurations.
How to Install and Use an SSD (Solid-State Drive)
In the following image, you can see the power cable and SATA cables. Look how they were attached. Here I used addlink SSD. It’s a good budget-friendly SSD.
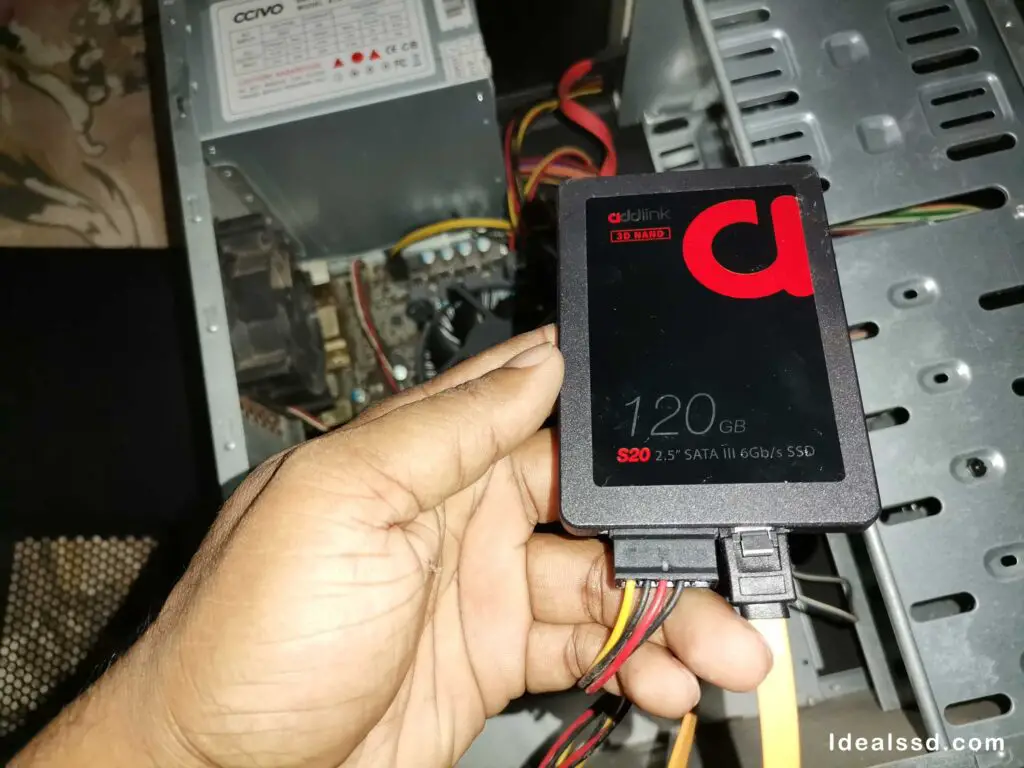
Now you got every cable you need. Now safely remove your old hard drive and install the SSD following the guide.
- Power off your computer and unplug it from the wall outlet.
- Open up your computer case. On most laptops, this can be done by removing a few screws on the back of the unit. For desktops, you will need to remove the side panel.
- Locate the hard drive bays on your computer. Hard drives are typically located near the motherboard, and they will be either a metal tray with connectors on it or a plastic box with several cables coming out of it.
- Remove the old hard drive from its bay. This can usually be done by pulling straight up on the hard drive.
- Insert the new SSD into the bay. Plug the power cable and SATA cable like in the above photo.
- Replace your laptop’s side panel or screws, and reattach the power cord.
- Boot up your computer and enter the BIOS setup. The key to enter BIOS will vary depending on your motherboard, but it will typically be one of the F keys (F12, F11, etc.).
- Now select the SSD as the booting device
- Save your BIOS settings and exit.
- Your computer will now boot from the SSD. Enjoy your new, faster hard drive!
I also created a video to give you a full understanding. Make sure to subscribe for future videos. 🙂
Interested in the best SSD brands for your laptop or desktop computer? Refer to this article Best affordable SSD for gaming
References
Serial ATA : https://en.wikipedia.org/wiki/Serial_ATA